Building WordPress Social Media Sharing Plugin
Published 4 years ago by LankaTricks
If you are like to build and use your own WordPress plugin and use it for your WordPress project, then this tutorial for you. In this tutorial, I am going to explain how to develop your own social media sharing WordPress plugin by yourself.
So, I would like to name this social media sharing plugin as “WH Social Share”. Let’s start to make the WH Social Share plugin.
This social media sharing plugin gives an opportunity to your website visitors to share your website content easily on social media websites. By doing social media sharing, it helps to increase the overall awareness and traffic of your website.
There are lots of social media sharing plugin are available for free to use. But, by developing this social media sharing plugin by yourself, you can include it many more functions you need. And also can get lots of fun as well as lots of knowledge about WordPress plugin development.
Why your content needs social media sharing buttons?
Considering user response about content on the internet, it reported that 75% of users consider reading content based on their friends’ recommendations.
By using a social media sharing button with your content, you give your website users the ability to share your content with their own networks of friends.
So, there are more than 40 billion shares are clicked each day on the internet, therefore, by adding social media sharing buttons for your WordPress website, That will be the first step of helping to market and ranking your website.
Make Directory and Files for Plugin
To make your own plugin. First, you need to make a directory for that plugin inside the folder of your WordPress installation plugin directory (in my example I create a directory called “wh-social-share”).
Then you need to make the following file inside the folder of “wh-social-share“.
- wh-social-share.php
- style.css
In the wh-social-share.php file add the following comment in the top of the file to make the plugin installable.
/*
 * Plugin Name: WH Social Share
 * Plugin URI: https://realcodex.com
 * Description: Display Social media sharing button in your every single posts.
 * Version: 1.0.0
 * Author: Niroshan
 */
Create Admin Menu Item
When developing a plugin it needs a control option page for admin. By using that admin can select what buttons for which social media sites should be displayed.
For creating a plugin options page first need to create a menu item to which the options page will be attached to. Following is the code for creating an admin menu item under Settings’ top-level menu item.
function wh_social_share_menu_item()
{
add_submenu_page("options-general.php", "WH Social Share", "WH Social Share", "manage_options", "wh-social-share", "social_share_page");
}
add_action("admin_menu", "wh_social_share_menu_item");
Here we’re adding a menu item using add_submenu_page WordPress function which is indeed called inside the admin_menu action. wh_ social_share_page is the callback function and It helps to display the contents of the options page.
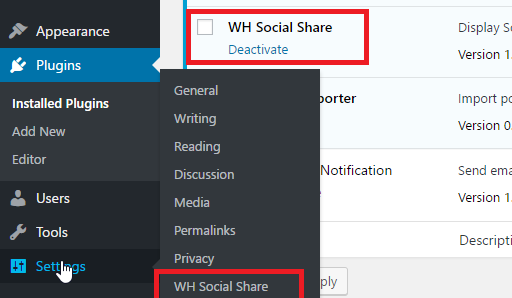
Following is the menu item look inside the admin menu.
Creating an Admin Options Page
To create the admin option page need to create wh_social_share_pagefunction for displaying the options page content.
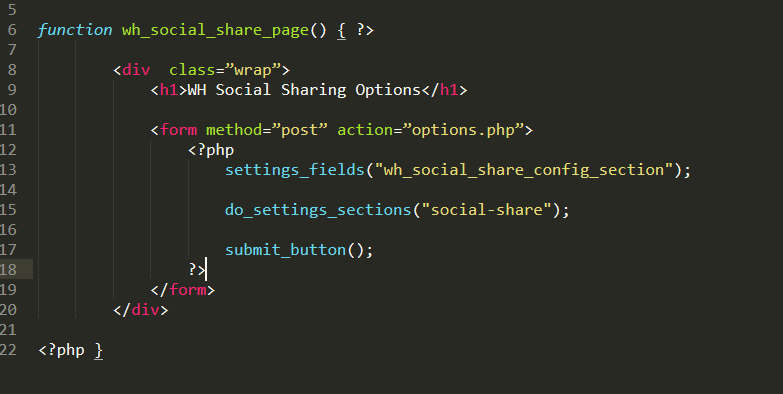
The above function adds a section called wh_social_share_config_section, and registering the settings as wh-social-share.
Now we can code for displaying the section and their option fields.
function wh_social_share_settings()
{
	add_settings_section("wh_social_share_config_section", "", null, "wh-social-share");

	add_settings_field("social-share-facebook", "Display Facebook button?", "social_share_facebook_checkbox", "wh-social-share", "wh_social_share_config_section");
	add_settings_field("social-share-twitter", "Display Twitter button?", "social_share_twitter_checkbox", "wh-social-share", "wh_social_share_config_section");
	add_settings_field("social-share-reddit", "Display Reddit button?", "social_share_reddit_checkbox", "wh-social-share", "wh_social_share_config_section");

	register_setting("wh_social_share_config_section", "social-share-facebook");
	register_setting("wh_social_share_config_section", "social-share-twitter");
	register_setting("wh_social_share_config_section", "social-share-reddit");
}
By using the above code add an option to admin for selecting the required social media button to show in the post section.
Following is the admin option page look of our WH Social Media Sharing plugin.

Displaying the Social Sharing Buttons on Post
To display the social sharing button in your every web post. We need to filter the post content and add the social share button for that content.
Following is the code for how to filter post content and display social media buttons.
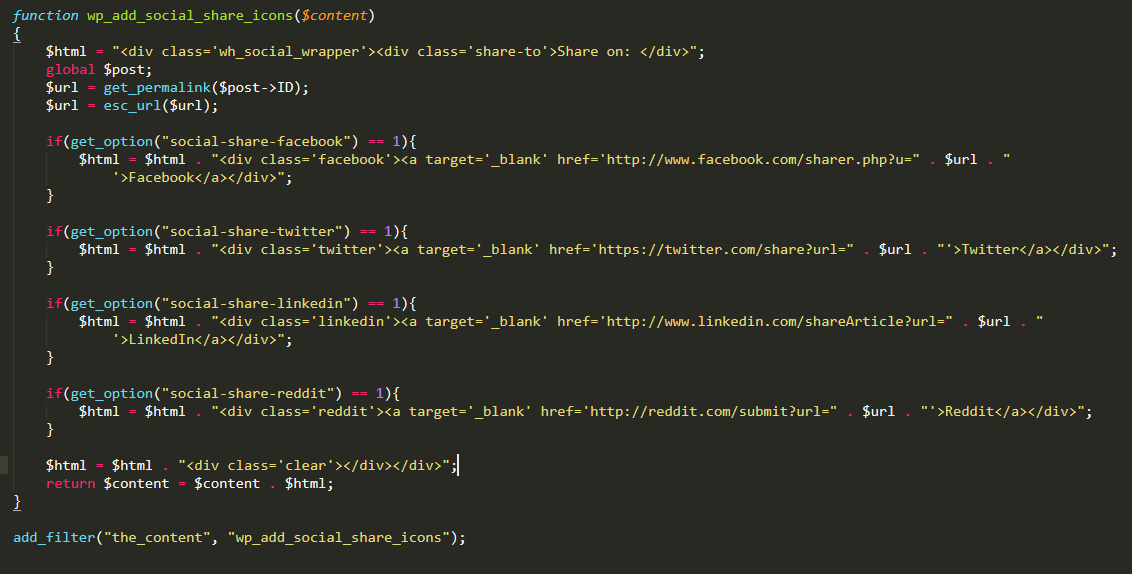
This is the way of working above code. First, we are adding a wrapper for our social sharing links. After that, retrieving the complete URL of the current post which needs to share with the social media sites.
Then, check which button needs to display in the post content and finally, adding the current post URL to the end of the social sharing links of the related social media sites.
Following is the post view of after compliantly adding the above codes in your plugin.

Add Styles for Social Media Buttons
Before adding CSS style to Social media buttons, you need to add style.css file to the front end of your website. By adding the following code, you can attach style.css file to front end your website.
function wh_social_share_style()
{
   wp_register_style("social-share-style-file", plugin_dir_url(__FILE__) . "style.css");
   wp_enqueue_style("social-share-style-file");
}
add_action("wp_enqueue_scripts", "wh_social_share_style");
Following CSS styles you can add for your plugin style.css file and can see its effect on the social media button. So, you can change these styles as you need.
.wh_social_wrapper div{ float: left; margin-right: 10px; }
.wh_social_wrapper div.share-to{ padding: 5px; font-weight: bold; }
.wh_social_wrapper div a{ border: none; text-decoration: none !important; }
.clear{ clear: left;}
.wh_social_wrapper div.facebook{ background-color: #3a5795; padding: 5px; }
.wh_social_wrapper div.twitter{ background-color: #55acee; padding: 5px; }
.wh_social_wrapper div.reddit{ background-color: #ACD4FC; padding: 5px; }
.wh_social_wrapper div.facebook a{ color: white; }
.wh_social_wrapper div.twitter a{ color: white; }
.wh_social_wrapper div.reddit a{ color: white; }
The following shows the social media sharing icons after adding styles.
![]()
Conclusion
In this post, we discussed the way of creating a WordPress plugin for social media sharing of your website post. We designed a plugin to add social media icons after the post content.
Here, we mainly discussed things such as Make Directory and Files for Plugin, Admin Menu Item Creating, Creating an Admin Options Page, Displaying the Social Sharing Buttons on Post, and Add Styles for Social Media Buttons.
So, If you need to basic knowledge about designing a WordPress website you can use this complete tutorial of Complete Guide to Create Website using WordPress by Yourself
If you don’t have any previous knowledge about WordPress plugin created, you can read Building WordPress Plugin tutorial.
Good Luck!